
Ordering a custom dome array isn’t like buying off-the-shelf components. There’s no part number to punch into a distributor website. Instead, there’s a conversation — sometimes several — between the designer and supplier about exactly what this specific dome array needs to be.
That conversation goes smoother when the designer arrives prepared. Knowing which parameters matter, which can be left to supplier discretion, and which require tight specification separates efficient procurement from endless back-and-forth clarification emails.
The checklist isn’t complicated. But it’s surprisingly easy to forget something, especially for engineers placing their first custom dome array order. A missing dimension here, an unspecified tolerance there, and suddenly the quote takes another week while someone tracks down answers.
Dome Specifications for Custom Dome Array Orders
Dome Diameter
| Diameter | Typical Force Range | Common Applications |
| 4-6mm | 100-180g | High-density keypads, small devices |
| 8-10mm | 150-250g | Consumer remotes, appliance panels |
| 12-14mm | 180-300g | Automotive controls, industrial panels |
| 16-20mm | 200-350g | Heavy-duty equipment, large buttons |
Non-standard diameters are possible but may involve tooling charges. Sticking to supplier standard sizes when acceptable keeps costs down and lead times short.
Actuation Force
How much pressure triggers the snap. Force specifications usually state the peak force before snap-through. Users perceive this as button stiffness.
Light force (under 170g) suits applications where gentle touch is desired or repeated pressing might cause fatigue. Heavier force (over 250g) prevents accidental activation in environments with vibration or where users might brush against controls unintentionally.
Force tolerance matters too. Specifying 200g ±15% gives the supplier reasonable manufacturing window while keeping consistency across the dome array.
Dome Shape
Round, four-leg, oblong — each geometry offers different characteristics. Four-leg domes provide superior tactile ratio and stability. Round domes cost less and tolerate off-center actuation better. Oblong shapes fit rectangular button openings where round domes wouldn’t.
For mixed layouts, specify shape per position. A single custom dome array can incorporate different shapes across different switch locations.
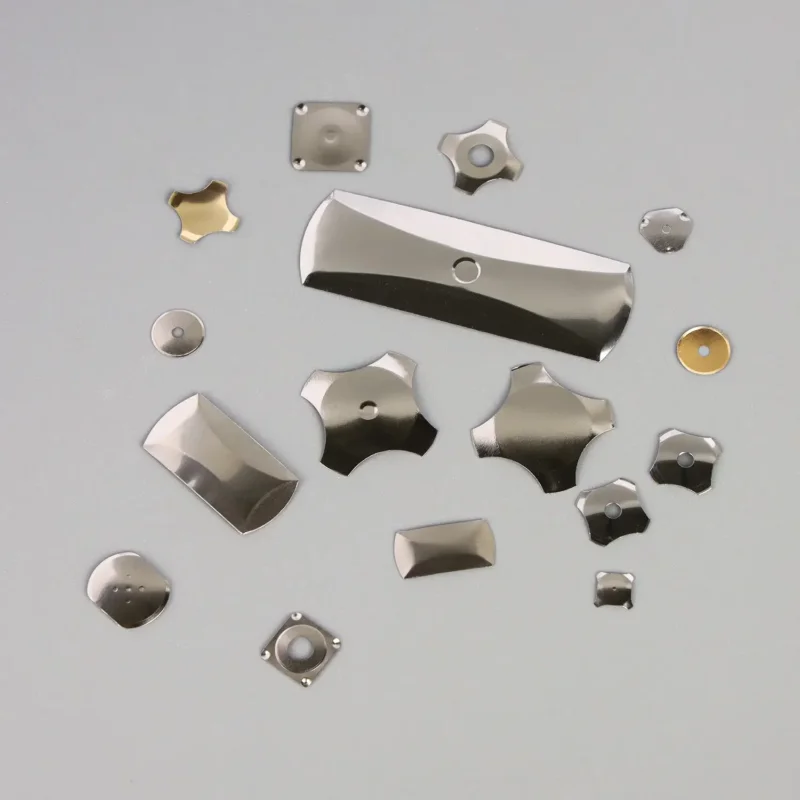
Dome Material and Plating
Standard domes use stainless steel — typically 301 grade. This works for most applications. The contact surface usually gets gold or nickel plating over a base metal layer.
Plating options include:
- Nickel only — economical, adequate for typical circuits
- Gold flash over nickel — better corrosion resistance, lower contact resistance
- Heavy gold plating — premium option for low-current or harsh environments
Gold adds cost but improves reliability in demanding applications. Medical devices, automotive electronics, and anything with long service life expectations often justify the upgrade.
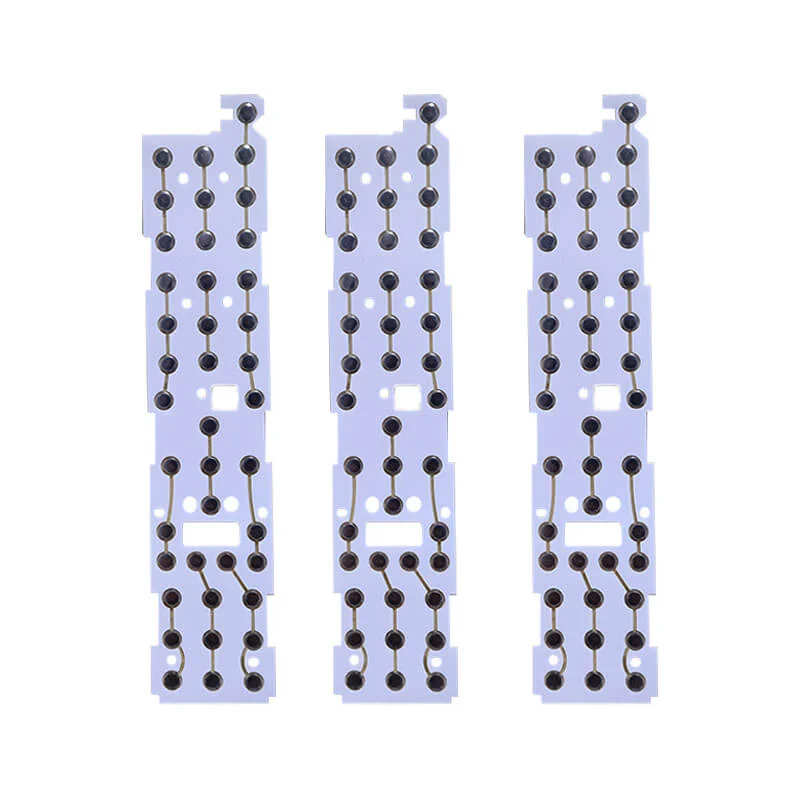
Carrier Film Parameters for Dome Array Design
Film Material
The carrier holds domes in position and provides the adhesive interface to the PCB. Polyester (PET) is standard — stable, inexpensive, compatible with most adhesives.
Polyimide (Kapton) carriers handle higher temperatures but cost more. Only specify polyimide when operating environment genuinely requires it.
Carrier Thickness
Thicker carriers add rigidity, which helps during handling and placement. Thinner carriers minimize stack-up height for slim products.
Typical options range from 0.05mm to 0.15mm. Most applications work fine with 0.075mm or 0.1mm standard offerings.
Adhesive Type
Pressure-sensitive adhesive (PSA) is standard. Key specifications include:
- Bond strength to target PCB surface finish
- Operating temperature range
- Outgassing characteristics (important for sealed enclosures)
- Repositionability during assembly (if needed)
High-temperature adhesives exist for automotive or industrial applications where standard PSA would soften or fail. Specify operating environment clearly so the supplier recommends appropriate adhesive.
Layout and Dimensional Requirements in Dome Array Orders
Dome Positions
The supplier needs exact dome center coordinates, referenced to a datum — usually a corner or tooling hole. Provide these as:
- CAD file (DXF preferred by most suppliers)
- Dimensioned drawing with coordinates
- Spreadsheet with X/Y positions
Errors in position data translate directly into misaligned switches. Double-check coordinates against PCB pad layout before submitting.
Carrier Outline
Overall carrier shape and size. Include:
- External dimensions
- Corner radii if not sharp
- Any cutouts for components or mounting features
- Tooling hole locations and diameters
Tooling holes matching PCB mounting features simplify assembly alignment dramatically. Worth adding even if the product design doesn’t strictly require them.
Tolerances
What precision does the application actually need? Tighter tolerances cost more.
Standard positional tolerance for dome centers is typically ±0.3mm. Critical applications might need ±0.15mm or better. Carrier outline dimensions usually hold ±0.2mm without difficulty.
Specify only the precision actually required. Over-specifying tolerances increases cost and may extend lead time as suppliers implement additional inspection steps.
Documentation to Provide With Custom Dome Array Orders
A complete order package typically includes:
- Engineering drawing showing layout, dimensions, and tolerances
- CAD file in compatible format
- Written specification covering materials and performance requirements
- Reference to any industry standards (automotive, medical, etc.)
- Sample quantity and production forecast for quoting purposes
Some suppliers provide templates or specification forms to ensure nothing gets missed. Using these — rather than starting from scratch — catches omissions before they delay the quotation process. If you want to know more about dome array, please read What Is a Dome Array.
FAQ
How long does a custom dome array order typically take?
Lead times vary considerably depending on complexity and supplier workload. Simple designs using standard dome sizes and materials might ship in two to three weeks. Complex layouts requiring custom tooling or unusual specifications can stretch to six weeks or longer. Initial samples often come faster than production quantities. Building extra time into development schedules for dome array procurement prevents last-minute scrambling. Establishing relationships with suppliers before urgent needs arise helps too — repeat customers sometimes get prioritized.
What minimum order quantities apply for custom dome arrays?
Most suppliers accept low quantities for prototyping — sometimes as few as 10 or 25 pieces. Unit costs at prototype volumes are significantly higher than production pricing, but this is expected and reasonable. Production minimums vary widely by supplier, ranging from 500 to 5,000 pieces as typical thresholds for volume pricing. Some suppliers offer blanket order arrangements where annual commitments secure pricing while allowing smaller release quantities. Discussing forecast volumes during initial quoting conversations helps suppliers propose appropriate arrangements.
Can design changes be made after initial samples arrive?
Yes, and this happens frequently during development. Sample evaluation often reveals that specified force is too light, or dome positions need slight adjustment for better alignment. Suppliers expect iteration. Minor changes — adjusting force by changing dome thickness, shifting positions fractionally — usually involve minimal additional cost. Major changes requiring new tooling or different carrier outlines may incur charges and extend lead time. Communicating early that designs are provisional rather than frozen helps set appropriate expectations on both sides.