
There is something oddly satisfying about a perfect “click.” It’s a small mechanical event, really, just a piece of bent steel snapping down and popping back up, but it communicates so much. It tells the user, “Yes, your command was received.” However, achieving that consistent, crisp feedback in a custom metal dome switch is deceptively difficult. It looks simple—it’s just a curved piece of metal, right? But ask any engineer who has had to recall a product because the buttons started feeling “mushy” after a month, and they will tell you otherwise.
Designing a custom metal dome involves balancing physics, material science, and manufacturing tolerances. It is rarely a straight line from CAD drawing to production. Things go wrong. Tolerances stack up. And often, the devil is in the details that don’t seem important until the prototypes arrive and half of them don’t work.
The Geometry Trap in Custom Metal Dome Engineering
The most frequent mistake isn’t usually the material selection; stainless steel is fairly standard and forgiving. The mistake is in the geometry, specifically the “snap ratio.” This is the relationship between the actuation force (how hard you press) and the release force (how hard it pushes back).
If you design a custom metal dome with a snap ratio that is too high, the button feels aggressive, almost like it is fighting the user. If it is too low, the switch feels broken or non-existent, even if it makes electrical contact. A lot of designers chase a specific peak force—say, 300g—but ignore the release. The result is a switch that gets stuck down or feels “sticky.” It’s a delicate balance. You want a distinct tactile drop, but the dome must have enough energy to reset the actuator overlay instantly.
Another geometric oversight is the “foot” design. On a four-leg dome, the feet need to slide slightly outward when the dome collapses. If the pocket or the solder mask on the PCB restricts this movement, the dome binds. It stops snapping. It just bends. And a bending dome is just a resistor, not a switch.
PCB Layout and Venting Issues for Custom Metal Domes
You could have the most perfectly manufactured dome in the world, but if the Printed Circuit Board (PCB) beneath it is designed poorly, it won’t matter. This is probably where most integration projects fail.
Consider the air. When you press a custom metal dome down, the air underneath has to go somewhere. It seems trivial, but if there is no venting channel between the dome and the PCB pads, that trapped air acts like a pneumatic spring. It cushions the snap. The tactile feel turns from a crisp click to a dull thud. It’s a subtle difference, but users notice it immediately. They might not know why it feels cheap, but they know it feels cheap.
Typically, successful designs incorporate:
- Venting traces: Small channels cut into the solder mask or the spacer layer to let air escape.
- Clean contact pads: Gold plating is preferred over HASL (Hot Air Solder Leveling) because HASL surfaces can be uneven. An uneven surface under a metal dome leads to intermittent contact or rocking, which feels terrible.
Overlay and Actuator Alignment Problems
The dome doesn’t exist in a vacuum. It lives under an overlay, a graphical interface, or a silicone keypad. A common pitfall here is the size and hardness of the actuator—the little nub that actually pushes on the center of the dome.
If the actuator is too sharp, it can dent the custom metal dome over time. Once a dome is dented, its life cycle drops from a million cycles to maybe a few thousand. Conversely, if the actuator is too flat or wide, it loads the edges of the dome rather than the center. This effectively increases the actuation force required. You end up pressing harder, but the dome doesn’t snap because the force isn’t concentrated where it needs to be. It is a frustrating user experience where the button feels hard as a rock.
The Risk of "Ghosting" and Double Hits
Sometimes, a design works perfectly in the lab but fails in the real world because of “ghosting.” This happens when the actuator pre-loads the dome. Maybe the overlay is too tight, or the assembly screws are torqued down too much near the keypad. The custom metal dome sits in a semi-compressed state. It becomes hypersensitive. A light brush against the panel triggers it, or releasing the button causes a double signal (bounce) that software debouncing can’t always fix.
Comparing Dome Shapes and Their Failure Modes
| Dome Shape | Typical Use Case | Common Design Pitfall | Reliability Risk |
|---|---|---|---|
| Four-Leg custom metal dome | General purpose, high travel. | restricting the feet movement with solder mask. | Binding/Sticking down. |
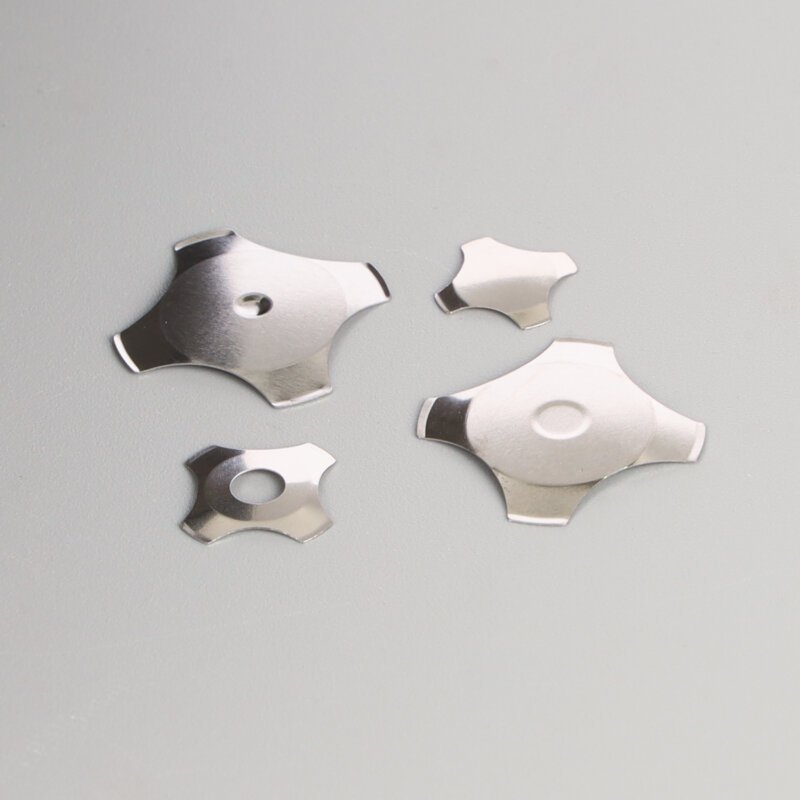
| Triangle custom metal dome | tight PCB spaces, high force. | Placing the actuator off-center. | Rocking/Intermittent contact. |
| Round custom metal dome | Low profile, short travel. | Inadequate venting (seals air easily). | Loss of tactile feel (Mushy). |
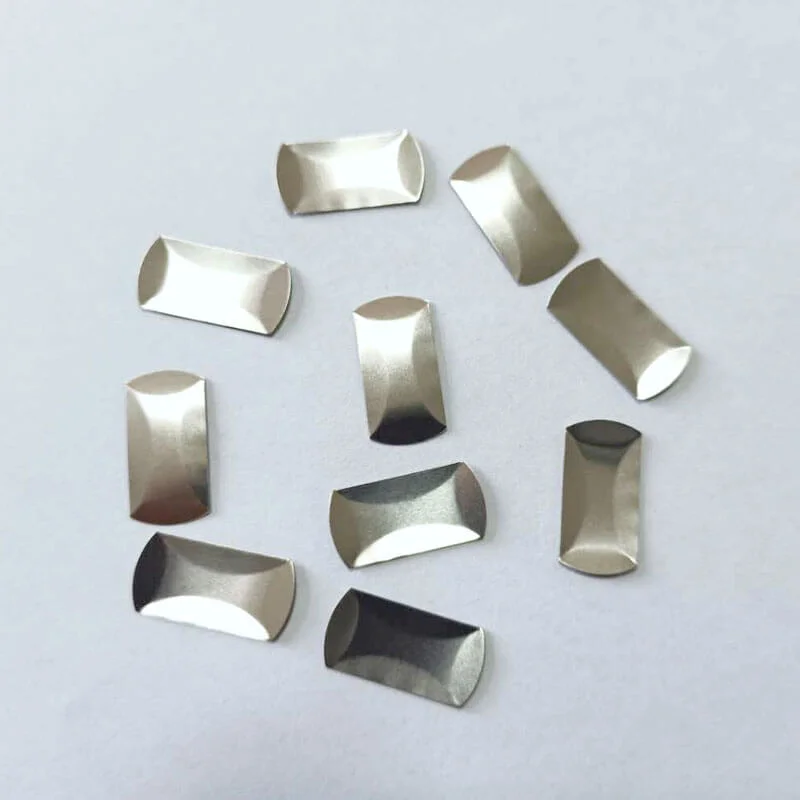
| Oblong/Rectangular custom metal dome | Narrow spaces on edge of PCB. | Misalignment during assembly. | uneven click ratio. |
Assembly and Handling of the Custom Metal Dome
Finally, we have to talk about how these things actually get onto the board. Manual placement is a nightmare for consistency. If an operator places a dome slightly off-center, the tactile feel changes completely.
A classic disaster in the assembly line is the “double dome.” Metal domes are often stamped from thin sheets and can stick together due to oil or static. If two domes stick together and get placed on a single pad, the actuation force doubles. The button becomes impossible to press. Automated pick-and-place machines usually catch this, but not always. If you want to know more about custom metal dome, please read The Complete Guide to Custom Metal Dome Design.
Resource
- ASTM International – ASTM F1578: Standard Practice for Contact Closure Cycling of a Membrane Switch. This document outlines how to properly test the life cycle of tactile switches.
- Wikipedia – Stainless Steel: Understanding the properties of the 300-series stainless steel typically used in dome manufacturing is crucial for predicting fatigue limits.
FAQ
Why does my custom metal dome lose its "click" after a few weeks?
This is usually a sign of metal fatigue or over-stressing. If the actuator pushes the dome past its yield point (too deep into the travel), the metal deforms permanently. It flattens out. Once it’s flat, the snap action is gone forever.
Can I use a custom metal dome on a flexible circuit instead of a rigid PCB?
Yes, absolutely. In fact, it’s very common in membrane switches. However, you need a rigid backer plate behind the flex circuit. If the surface underneath gives way when you press, the dome won’t snap; the whole assembly just bends away from your finger.
Does gold plating really make a difference for the contact pads?
For reliability, yes. While carbon or nickel can work for low-cost toys, custom metal dome designs for industrial or consumer electronics benefit from gold. It resists oxidation. Since the dome is a mechanical contact, any oxide layer on the pad increases resistance and can lead to signal failure, especially at low voltages.